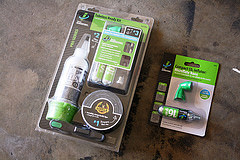
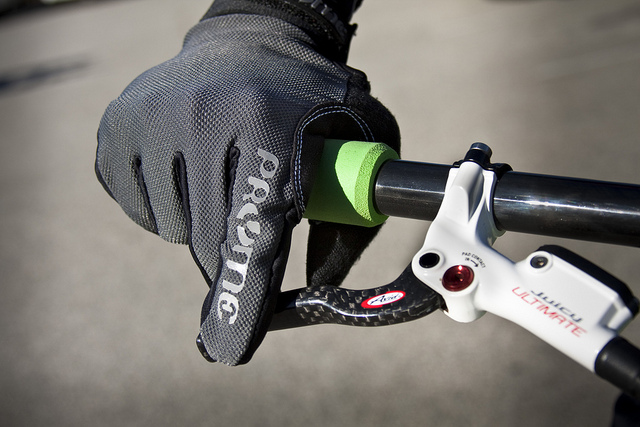
MtnBikeRiders.com | Dirt is good.

Spectrum Tech Wear-Wilson Shorts Review


I’ve spent about 6 months with the Spectrum Tech Wear Wilson Shorts and I feel that after riding with these shorts for many many miles that it was due for a review.

Specs:

* 330d Taslon nylon body w/ full nylon thread
* polyester mesh lining
* rear, side, and inner thigh stretch panels
* double snap closure
* tricot waistband
* accent bartacks for seam reinforcement
* Spectrum ECS (Elastic Closure System) waist fit adjustment
* Spectrum SCG (Seamless Crotch Gusset) leg panel
* zipper cargo pockets
* hidden mesh lined zipper0 vents


MSRP: $80.00, but on sale at Spectrum’s Website for $25.00

So let’s get down to the nitty gritty. These aren’t your regular baggies, no sir! These are what I would consider technical riding shorts. It does not come with a chamois to pad your buttocks, but it does come with some really cool features like a polyester mesh liner, big pocks, a unique and adjustable waist strap system and and it comes with a boat load of style and a big dose of quality workmanship as well as durable material.

What’s the purpose of these shorts? You can do some XC with them if you’d like, but like I mentioned they don’t have padding. So what I do is I wear a pair of bibs underneath an it works out to be a great combo. But these shorts were designed to be abused for riding downhill trails, 4x, dirt jumping and etc.

The front vents on the shorts were pretty nifty and work really well when you need a bit of fresh air to hit your hot legs and boy parts. You simply unzip the vents and the mesh liner acts as a privacy screen and it also allows ample cool air to flow.

That’s me wearing the Wilson Shorts at Southridge.

One of the things in life that really bug me are weak zippers. Yeah I know its weak but I’m super critical when it comes to inferior zippers. Nothing devalues a piece of clothing or equipment than some cheesy zippers.

Well I’m happy to report that the zipper quality and performance on the Wilson Shorts were pretty down right AWESOME! I was excited to know that Spectrum Tech Wear didn’t try and cut costs by saving a few cents on cheaper zippers. It totally paid of because after months of zipping and unzipping, the shorts are still as good as new!

Another great thing about these shorts is the durability. I’ve yet to tear them, puncture it or do anything to damage them. The Wilson shorts are really tough!

Ok so one gripe about the shorts, they can get warm. But here’s the thing about that. I experienced more heat when I was wearing my bibs underneath. So naturally an extra level of clothing will yield higher temps. But if I wore the shorts by themselves…(oh ya, you can go commando if you’d like) then the temp wouldn’t be an issue at all.

The bottom line, these shorts are high quality, strong zippers and hardware and affordable. For the low price of $49.98 at Pricepoint.com, you just can’t beat that! Besides they’re really cool looking too. So if you’re in need of some multipurpose shorts that could be worn as a XC baggy or used for more technical riding such as DH, 4X and Super D, then the Spectrum Tech Wear-Wilson shorts could really satisfy your needs.

Popularity: 18% [?]

Crocs Yukon Review


It has been over 5 1/2 months since I’ve received the Crocs Yukon To say that I’ve worn “tested” these is an understatement. I’ve practically worn the Crocs Yukon almost every day of those 5 1/2 months and I have to tell you, I still love them!

When I first got the Crocs, not everyone I showed them to loved them as much as I did. I had about 50% that thought they were fugly and the other 50% thought they were pretty cool.
worn crocs

Just in case you need them, here’s the specs:

• leather upper and neutral color combinations add rugged sophistication to this traditionally comfy clog
• ventilation ports increase breathability and filter water and debris away from the footbed
• loose fit allows foot to bend and expand naturally, reducing fatigue
• slip resistant and non-marking soles
• made with croslite™ material
MSRP $49.99

You’re probably wondering why are a pair of Crocs being reviewed on a mountain biking website. It’s simple, sometimes we don’t like to drive to the trail head in our riding shoes. So you put on a pair of Crocs before and after a ride.

But what I’ve done with the Crocs is beyond what I originally use for. I basically used the Crocs for just about anything I needed to do that involved shoes. I rode my bikes with them, worked on the car, went out to eat, go to the office, the beach, took them into the ocean…you name it I did it with the Crocs.

Due to all the wear and tear I’ve put on the Crocs, now the soles look like this.

They have been put to good use and still have plenty of life in them. But the most important question people ask me is, “are they comfortable?” I answer it by saying this, “Heck yah, best shoes I’ve ever worn, I think everyone should get Crocs!” I’m serious…

People may think I’m being sarcastic, but they ARE the best shoes I’ve ever worn. They slip on easily and thanks to the straps, they don’t slide off when you are wearing them. Another concern people have would be the quality of the shoes. They looks so “plasticy” is one said to me. I explained to her that I’ve never had problems with the Croslite material, straps, buckles, velcro, leather or any other part of the shoes to fail on me. These are built really well and should last you a long time.

So all in all, I’m very happy with the Crocs, I think more people should get them and you can even select which colors you want! Personally I think I’m going to get a pair of black Crocs soon!

For more information on CROCS, visit their website HERE.

Popularity: 14% [?]

Sette Reken Frame: Review


Well its been a few months since I first received the Sette Reken from PricePoint.com. I’d like to thank Magally Gomez and Brian Cleveland for sending us this frame to test and review. So let’s get down to the nitty gritty.

Sette Reken Frame
sette reken
Price: $99.00, not bad if you ask me!

Specs:

Model Reken Hardtail
Material Full 6061 Alloy, Double Butted Main Triangle
Welding Tig Welded
Wheel Size 26″
Headset 1-1/8″ Standard
Front Derailleur Size/Mount /Type 31.8mm, Clamp, Top Pull/Top Swing
Bottom Bracket 68, English
Seatpost Size 27.2
Seat Clamp Size 32.0
Disc Mount 51mm IS
Max Tire Clearance 2.3″
Available Sizes 14″, 16″, 18″, 20″
Color Black
Weight 4.5 lbs/ 2041g (18″)
Warranty 5 Year Manufacturer’s Warranty

Size 14″ 16″ 18″ 20″
Headtube Length 117mm 117mm 130mm 145mm
Top Tube Length (actual) 54.5cm 55.2cm 56.9cm 59.2cm
Top Tube Length (effective) 56cm 57.4cm 59.4cm 61.5cm
Seat Tube Length (C-to-T) 14in 16in 18in 20in
Chain Stay Length 424mm 424mm 424mm 424mm
Headtube Angle 70.5 70.5 70.5 70.5
Seat Tube Angle 73.5 73.5 73 73

If you scour the internet for product reviews of the Sette Reken, you’ll have a tough time finding it. For some odd reason people are either scared or skeptical of a mail order brand frame or bike. People like to stick to the well known brands thinking that they are of superior quality. But in reality, the same factory that made those chic brands was probably the same factory the Sette Reken came from, besides the frame has a 5 year warranty!

The Sette Reken started off as a single speed project back in Winter. I had talked to Magally Gomez about wanting to build an affordable single speed mountain bike. After a few words, she agreed to send me the Reken frame for our project along with their single speed conversion kit and tensioner.
sette reken single speed

The Reken would be my second single speed to build up. I came off another single speed full suspension project I had started around Christmas time. But by January, the Sette Reken was on the trail.

A couple things I noticed about the Sette Reken that made me immediately fall in love with it. First was the geometry. It had a slack 70.5 degree head tube angle that made it more comfortable to ride. I ran a 90mm stem on it because I have short arms, the frame was a 16″, stout, and flickable.

Single speed riding causes quite a bit of stress on any bike. The Reken held up nicely throughout the months of abuse that I gave it. I’ve taken that bike on some of the hardest climbs I can handle to the technical trails such as Rockit, and Lynx at Aliso Woods.

One of my favorite aspects of the Reken is the color, flat black. It’s unassuming, very humble and low key. It’s what you would call a sleeper bike. But once you put some power to those pedals, this thing responds. The Reken doesn’t have a lazy bike feel. It was light enough (25lbs), so that mean I could get up to speed really quick and since it weighed like an anorexic teenage girl, the bike was easy to handle.

Then at one point I had this idea of converting the Reken into a 69er. The frame did well, and there was some concern that the head tube angle was too slack to accept a 29er wheel. But during that time, the bike never felt like a chopper and rode just fine. However, that didn’t last too long since it wasn’t my cup of tea to ride a rigid 69er.

Now at a cross roads where I am considering turning the Sette Reken into a geared bike, perhaps a 1×9. This actually brings me to the summary of this review.

The Sette Reken by far has surpassed my expectations of this frame. I honestly thought that the frame would be OK to use on a build and possibly do well in the review. But after months and months of hard single speed riding, the frame has performed way better than I and anyone else thought. This is a frame that I could literally do just about everything with. Not only does it make a great single speed, but its disc brake ready, gears ready, has an awesome paint job(never chipped during review) and its totally versatile! This frame has seen more projects and tests done on it than any other bike we’ve tested.

So to say that I highly approve of the Sette Reken is an understatement. This frame ROCKS and as the Co-Founder of MtnBikeRiders.com, I am authorizing and approving that this frame gets the Stamp of Approval from MtnBikeRiders.com. Um…that’s a big deal! That means this bike has done its job and a bag of chips! I cannot say enough about how much I absolutely love this frame. Besides the $99 price tag makes it easy on your budget

Popularity: 22% [?]

Review: Ay Up Lights MTB Kit


Who:
Ay Up Lighting was born over two years ago and has developed into a world beater. We supply the lightest and coolest looking lights on the planet. No corner has been cut to provide a safe, reliable lighting system to suit the average Joe and the Elite racer. With weight, functionality, long burn, light output and low cost at the top of the design spec it took many months to evolve into what we have today. It will not stop there. We will continue to evolve the system for ever more. With a lifetime of engineering design, manufacture and systems experience behind us Ay Up Lighting can only get better. Our light has been designed to be a multi purpose unit.

Product Tested:
Ay Up MTB Kit


Ay Up lights: Pink has intermediate beam, Yellow has narrow beam

Website’s MSRP:
$ 465

Specs:
Twin light and helmet mount
Light neoprene storage belt pouch
Twin light and handlebar mount
Light neoprene storage belt pouch
One spare handlebar mount
Four spare light mounting bands
One 6hr on / off switched battery complete with neoprene mount anywhere pouch
One neoprene 6hr battery attachment strap, prevents movement
Two 3hr on / off switched batteries complete with neoprene mount anywhere pouches
One 110V - 240V Adaptor in neoprene pouch, to suit dual channel charger
One 12 Volt Dual Channel Lithium Polymer Charger – charge two batteries at once
One 12 Volt Adaptor (Cigarette Lighter Plug)
One extension cable 1200mm long, enables battery to be placed in backpack or pocket
One roll up pouch, all items fit snugly inside
One handlebar rubber packer kit to suit Diameters 25mm & 32mm bars
Handful of Ubeaut cable ties
Optional extra’s are -
Both sized batteries
Additional charger & accessories
Additional mounts


The whole MTB Kit

About Me:
6’1” 210lbs, 28 year old male. I’m a mountain biking enthusiast who enjoys XC riding.

Testing Grounds:
Local trails & streets of Southern California

First Impressions:
Small and a bit overwhelming. My first thoughts was: Would these lights be powerful enough to light up the trail? The lights themselves were small and they wouldn’t be putting out a lot of light power, 300 lumens to be exact. To give you some perspective of really how small these lights are, below is a picture of one of the lights next to my Motorola Razr, a universally recognized phone if there is one. The Ay Up light’s length about the width of my Razr!


Length of light about the same width as my Razr

I was a bit overwhelmed with the number of pieces involved in this MTB Kit. There are easily 30+ pieces including zip ties, spare mounts, chargers and various other pieces. Sorting them all out took some patience comparing pictures from the internet to what was being provided. But once I figured it all out, the assembly was a snap.

Strengths:
The first thing I have to start with is size & weight. The Ay Up lights are small. As I mentioned before, the length of the Cree light set is about the same width of my Razr. The width of the lights is slightly wider than my stem’s width. This is a small light system. The 3-hour battery is not much bigger. The battery fits comfortably on my stem with room to spare. Having a short wire between the battery and the light is also nice because it means that there is less chance of entanglement (from stem to handlebar) or getting ripped off by a tree branch (when mounted on the helmet).


Out on a group ride with the Ay Up lights

I mostly rode with the 2 x 3-hour batteries. One went on my helmet connected to the narrow beamed lights and the other 3-hour battery went on my stem connected to the wide beamed lights which went on my handlebar. Ay Up claims that the battery plus the lightest come in at about 130 grams (light – 60grams & battery – 70grams). And although this is a significant weight, it doesn’t feel like much once you get used to it. In fact, I normally just mount the light & battery to my helmet at the trailhead even if I know I might not have to use it until an hour or so into the ride. I found that the weight seems to disappear after a few minutes and never bothered me. You also have the option of running the extension cable from the light on your helmet to a back pocket if you don’t like the battery on your helmet.

I found the lights to be very tough and the finish to be excellent. I’ve done everybody a favor here and crashed hard with the Ay Up lights. When I got up from my crash I was expecting to see some damage to the lights. Afterall, the bike got a few nicks, even on the handlebar. To my surprise, the lights were shining as brightly as ever. There was not one scratch on the shell or the lens of the light. I was pleasantly surprised.


Not turned on, but already mounted to my helmet, the Ay Up lights are that lightweight

I’ve also been pretty harsh with these lights. I toss them in my bike stuff bucket after I’m done riding, taking only the batteries out for recharging. I keep a variety of bike stuff in my bike stuff bucket including a shock pump and an aluminum hand pump. My bike stuff has been rattling around with the Ay Up lights for the last three months and the Ay Up lights still look brand new, or in ebay terminology: mint condition.


Mounted via zip ties. Very simple design, and easy to fix if anything ever happened

The Ay Up lights are powerful. I never desired more light output from these lights. I’ve cruised up to 25+ mph on the trail and well over 30+ on the street with these lights and I never wished for more reach. The light is plentiful, clean and clear. In fact on just about every ride I went on someone complimented the Ay Up lights. Even when I was on a solo ride, I passed two riders who went gaga over them commenting on how the light output of the Ay Up lights was drowning out their own set of lights as I overtook them on the trail.

I’m impressed with the neoprene sleeves for the different batteries. The battery always stayed in the battery sleeve as this made them quick and easy to mount. They battery sleeves are soft, durable and the velcro is easy to use. The battery sleeve also has a loop on the back for a velcro strap to mount to your bike’s stem. I see the battery neoprene case lasting a long time.


Neoprene sleeve holds the battery and the wide velcro strap keeps it in place on the stem

The lights can be adjusted separately. Each light is able to rotate 270 degrees for more beam coverage of the trail or pointed along the same angle for more power. I personally went with the latter as I found the beam coverage to be more than adequate. But if you prefer more beam coverage, the benefit of the two lights is that you can point one just in front of your front tire and the second light can be pointed further down the trail spreading your beam out.

Weakness:
I am a bit underwhelmed by the neoprene packaging for the whole light system. The neoprene sleeves for the batteries are great, as I mentioned above, but my thoughts on the neoprene packaging for the whole light kit differ vastly. The neoprene packaging that you “store” the whole light kit is difficult to use. It is especially difficult if you do not remember where everything goes. I could not, for the life of me, repackage everything back together so that it looked as nice and clean as it did the first time I received the lights. After a while I ended up just storing everything in an empty shoe box.

I also didn’t particularly like the handlebar rubber packer. This is the protective sticky rubber strap that sticks to your handlebar so you can mount the handlebar mount. The handlebar rubber packer left a bit of residue and began moving around underneath the handlebar mount. After a while, I removed the handlebar rubber packer and took cut a piece of tire tube and zip-tied the tube to my handlebars. I then mounted the handlebar mount and this worked perfectly for the rest of the testing period.


Handlebar Rubber Packer replaced with a tire tube zip-tied to the handlebar

Summary:
The Ay Up lights are an exceptional piece of equipment. They are light enough for the pro racer while also simple enough for the novice mountain biker to use. If you’re looking for an excellent blend of weight, simplicity, durability, beam output and price, then look no further than the Ay Up lights. They’ll be the ones for you.

For more info on the Ay Up MTB Kit, click here.

Popularity: 22% [?]

KHS XCT 535 Review


This is the KHS XCT 535, a great bike…that’s pretty much all you need to know. But since we are professional reviewers, I am obligated at the same time privileged to provide our readers a thorough review.

Let’s get down to the meat and potatoes, if your a Vegan, the cucumber and carrots. I don’t want to bore you by repeating my first impressions of the bike, you can just read it HERE.

Here are the specs:

Frame
New Trail Design AL6061, 4-bar Horst bearing linkage 5.5″ Travel
Rear Shock Rock Shox Bar 2.1, air w/rebound adjust
Fork Marzocchi MX Lo, 120mm, variable compression lockout
Headset Tioga ZST2,Threadless,zero Stack
Rims WTB Speed Disc doublewall, w/eyelets
Hubs Front: Alloy disc, Rear: Shimano disc, QR
Tires John Thomac Nevegal 26×2.1
Spokes 14G black, 32°
Front Derailleur Shimano Deore
Rear Derailleur Shimano XT Shadow
Shifters Shimano Deore
Chain KMCZ9000
Crankset FSA Moto MegaExo 2-piece, 44/32/22
Bottom Bracket FSA MegaExo outboard catridge bearing
Cassette Shimano HG50 11-34 9-Speed
Pedals Wellgo M919 clipless
Seatpost Alloy Micro-adjust
Saddle WTB Silverado
Handlebar FSA XC-280B, 31.8, Alloy, 40mm rise
Stem FSA Alloy
Grips WTB Weirwolf
Brake Levers Avid FR5
Brakes Avid BB5 cable disc, 7″ front/6″ rear
Color Flat Brown-Gray
Frame Size S, M, L
MSRP $1599


About Me:

I’m about 5′7″ on a good day, I weigh about 190lbs, I’m husky and I can put on some hurt with any bike I ride. I am a Single Speed convert, 95% of the time I’m riding my SS. But I do love technical trails with ALL Mountain bikes.

Trails Tested:
The KHS XCT 535 has seen quite a bit of action in recent months. It’s been ridden at places like Turnbull Canyon, Fullerton Loop, Santiago Oaks, Aliso Woods (Woods Canyon, Rockit, Cholla, Coyote Run, and Dripping Caves).

Strengths: The XCT 535 is definitely a strong bike. It’s well versed to be ridden in XC conditions yet strong enough for you to take it through some of the nastiest and technical terrain you can think of. There are many great things about this bike that makes it unique. Well for one the Horst Linkage. I’ve ridden many Specialized bikes in the past and have always longed to ride other bikes with that same suspension linkage. Luckily the XCT 535 is equipped with it and its complimented by a 4 bar linkage.

A couple of things that stand out, the bike is REALLY REALLY fun to ride. Bombing down technical single track, rock gardens and 1-3 footer jumps makes this bike come alive. I really think that this bike has a potential to be ridden as a downhill bike, 4X (4 Cross), or Super D. Why? Well its simple really, the bike can handle just about anything you can throw at it and when it does, it laughs back at you, much like a fairytale giant would when the town peasants are throwing rocks and spears at him.

Let’s talk about the suspension. As you might have already read, the fork is a Marzocchi MX Lo, 120mm, variable compression lockout and the rear shock is a Rock Shox Bar 2.1, air w/rebound adjust. My favorite feature on the fork is the lock out. What’s cool is you can set how low you want it to lock. It also offered a very plush front end ride. The Marzocchi did an awesome job in absorbing the the trail. In fact this fork saved me from what could have been a REALLY bad crash.

Long story short, the trail I was on turned into a large rut. I had 2 choices, either ride the rut and go over the bars or try and get out of the rut, roll onto the embankment and hope that the suspension would absorb, and the tire would grab. Well sure enough, I’m writing this review injury free! The fork took in a few inches of travel to absorb the energy my husky self along with the speed I built up, and worked flawlessly. This is probably a good time to mention the grabbing power the John Thomac Nevegal 26×2.1 have. Man those things were awesome! I felt VERY confident taking any turn, riding any berm and the most technical trails with them.

Then we have the the rear shock. It’s butter. It’s the Shiz-nits. It’s Da-bomb! Seriously, the rear shock had no bob and it was really easy to set up. Once I dialed in the rear shock, I was happy. There really isn’t much more to say about it other than that thing worked well. Not once did I feel that the rebound was either too quick or too slow. As long as I followed the directions on setting it to my weight, sag and all that, the shock worked. But I’m sure the FSR linkage helped.

That’s another thing I do have to mention. The Horst Link suspension is a dream. I’ve been on all sorts of suspension bikes, from single pivot, to 4 bar, nothing compares to the Horst Link that is set up on the XCT 535. Its almost difficult to explain the big difference between that and a single pivot, but I’ll do my best. Single pivot, or any other 4 bar set up (without Horst) could be like driving a really cheap car…let’s just say a Hyundai Excel. But riding a bike with Horst, would be like riding in a nice big Cadillac. It really is plush and offers a responsive handling as well as a way that makes the trails seem flatter than what they really are.

Weaknesses:

I have 1 compliant. The bike is chunky. I did find myself having a hard time climbing with this bike on long and slow inclines. Perhaps I am just out of shape, but I definitely felt its weight going up some of the climbs. But here’s the thing, even with that, the XCT 535 does climb well. I never experienced the front end popping up during my climb due to a messed up geometry or too long of a fork. If you’re patient enough, and can/want to stay on the granny gear the whole time, the bike WILL get up the hill with no issues.

Coming off my single speed that weights about 5lbs lighter and geared with a 32/18, I had a hard time getting up some of the hills with the XCT 535 because I couldn’t stand spinning on the granny gear. However, there is a big pay off when you start to go down, makes all of it worth it!


Summary:

The KHS XCT 535 really is a great bike. Other than the weight affecting my climbing, then again I could lose a few pounds myself, the bike overall is an awesome ride. Going downhills is when the bike becomes really alert and responsive. I feel that the marriage between the parts and bike compliments its intended purpose of an ALL Mountain and Trail Bike. Just think of the frame and the components like a really sweet and perfect married couple. So sweet that its almost unreal. Well that’s the feel of this bike, its sweet.

The frame was pretty stout, meaning this thing was bombproof. One of the concerns I have for full suspension mountain bikes is how the rear end would have too much play, or lateral movement. The XCT 535 rides as stiff (frame) as a hard tail, and that’s good because the last thing I want is a bike’s rear end that hesitates or flexes.

The geometry isn’t too XC where you’re leaning too far forward, but its not too lazy where you feel like your on an exercise bike at the gym or on a DH bike, its a compromise of both worlds that gives the rider a comfortable riding position in which they can attack and be aggressive at the same time.

Priscilla even had the joy of riding the XCT 535 through Aliso Woods. Because of the XCT, she was able to ride down a technical rocky bed called Rock-It for the first time. Previous attempts would make her get off her bike and walk the rest of the way. But with the XCT 535, she made it down the trail and she knew that it was that fancy suspension that got her down the mountain.

Here’s our beef-cake being weighed…around 30.4lbs

If you watch this video, you’ll see me hustling the trail with the KHS XCT 535.

So you now probably wondering if I would recommend this bike? If you’re looking for a that can do just about everything in this world. Then the answer is YES. Go get one, you won’t regret it!

Popularity: 18% [?]

Review: Kona Hei Hei


Who:
The Kona Bicycle Company designs, manufacturers and distributes more than 60 models of purpose-built, high-performance mountain, road and urban bicycles. Founded in 1988 and headquartered in Ferndale, Washington, USA, Kona bicycles are distributed worldwide in more than 60 countries through independent specialty bicycle dealers. Kona funds several professional road, mountain and cyclo-cross racing teams that include World Cup Champions, World Champions and National Champions.

Product Tested:
2008 Kona Hei Hei

Website’s MSRP:
$ 2,999


Posing in the San Gabriel mountains

Specs:
Frame sizes: 14″, 16″, 17″, 18″ ,19″ ,20″, 22″
Frame tubing: Kona Race Light Scandium Butted, 2.5″ Travel
Fork: Rockshox Reba Race 85mm
Rear Shock: Fox Float RP2
Headset: FSA Orbit DL
Crankarms: Race Face Evolve XC X-Type
Chainrings: 44/32/22
B/B: Race Face Evolve XC X-Type
Pedals: Shimano M520 Clipless
Chain: Shimano HG53
Freewheel: Shimano LX (11-32, 9spd)
F/D: Shimano XT
R/D: Shimano XT Shadow
Shifters: Shimano XT
Handlebar: RaceFace Evolve Low Riser XC
Stem: RaceFace Evolve XC
Grips: Kona Race Light
Brakes: Hayes Stroker Carbon V6
Brake Levers: Hayes Stroker Carbon
Front hub: FSA XC-300 Wheelset
Rear hub: FSA XC-300 Wheelset
Spokes: FSA XC-300 Wheelset
Tires: Maxxis CrossMark 26 x 2.1 Kevlar
Rims: FSA XC-300 Wheelset
Saddle: WTB Rocket V Race Carbon
Seatpost: RaceFace EVOLVE XC
Seat clamp: Kona QR
Color: Ball Burnished/White

About Me:
6’1” 210lbs, 28 year old male. I’m a mountain biking enthusiast who enjoys XC riding.

Testing Grounds:
San Gabriel Mountains, Fullerton Loop, Turnbull Canyon, Santa Monica Mountains, San Juan and many other trails in Southern California.


Kona Hei Hei performed excellently on a 6 mile, 3000+ foot climb

First Impressions:
The Kona Hei Hei is a race bike! At first glance I wanted to name the Hei Hei “Stumpy” for its tiny rear shock. The travel on the Hei Hei is a meager 2.5 inches and in proportion to the large sized frame, the rear shock looks well… stumpy.

Visually the Kona is a sweet looking rig. The ball burnished finish on the front triangle’s front half is matched by the polished finish of the Race Face cranks. Even the graphics on the FSA wheels, which some don’t care for, I find make the Kona Hei Hei look like a fast bike even when it’s standing still. You are going to get some looks from other when you’re on this beast.


Ball Burnished front triangle offsets the white nicely

Strengths:
This is a race bike through and through. At 24.5 lbs, the scandium framed bike is very light for a full suspension. Personally, if I was going to spec my bike from scratch I would follow the philosophy Kona took with this bike. While not using very top of the line components Kona did spec the Hei Hei with high end, light weight parts with an eye on durability. You can see this with the XT shifter/derailleur’s, Race Face Evolve level cockpit parts and Rock Shox Reba/Fox RP2 suspension. Very high end, lightweight, but durable parts spec.

I am impressed with the suspension. In my experience, scandium frames have a propensity to feel a little brittle but I never got that impression with the Kona and that’s saying something since I normally ride steel. I found that the Hei Hei frame blends good frame feel and lightweight together. I also think the solid feel of the frame can be partially attributed to the four bar suspension. The suspension was exceptional for its purpose of XC and light trail riding. As long as you’re not hucking this bike off of 3+ feet drops the suspension will be choice for much of your riding.


On the trail, the Hei Hei easily devoured small rocks, climbing and descending.

I especially enjoyed how the rear suspension firmed up when the pro pedal was flipped on while on the flip side I experienced a ton more traction when I went to open the shock up. This was especially fun to experience on technical versus non-technical climbs. On flat fire road climbs, I flipped the pro pedal on and climbed easily without a loss of traction and just a tad bit of bob. When the trail became technical with either a steep grade or rocks/loose dirt, I flipped the switch to open and I immediately felt gobs of traction, at a small efficiency penalty. This penalty is worth it if it helps to keep me from dabbing or hike-a-biking.

The suspension felt particularly good on one of my last rides with the Hei Hei at Sullivan Canyon in the Santa Monica Mountains. I especially enjoyed how, as we were flowing through the singletrack canyon floor, the suspension ate up the trail making for a rather smooth ride for me. The trail is not difficult by any means, and I could have ridden it with a rigid, but it was so much more comfortable being able to just point and shoot through the small trail debris trusting the suspension to absorb the harshest of it.

The Hei Hei was also a winner in my book also due to its light weight. When I looked at my stable and saw the Hei Hei with a 3×9 drivetrain and full suspension then compared it to my 9 speed rigid 29er, it was easy for me to pick the Hei Hei to ride. The decision was made even easier when I compared weights and found that the Hei Hei weighed even less than my 29er. Ouch!


Small shock, but very capable of smoothing out the trail and providing a bit of traction for the climbs

Weakness:
The wheels. The FSA wheels are probably the only downside in this component group that Kona spec’d. They fell out of true quickly admittedly under a clydesdale and although still ride-able the wheels are not confidence inspiring. The wheels were not to the durability level as the rest of the components. But, although the wheels are a little weak, I am actually fine with Kona not spec-ing a higher end wheelset. The reason being if I were to purchase this bike as a race bike I’d probably go tubeless. Tubeless, theoretically, gives you less chance at flatting while also reducing weight. And although the FSA wheels can be set up tubeless, purchasing wheels designed for tubeless use will be lighter and stronger.

I was also not impressed with the grips but I’ve always found this to be more of a personal preference. I found the grips to be a little too small without a great feel. But again, this is more of a personal preference. I’m sure many of you will love the grips.

Summary:
The Kona Hei Hei is an outstanding contender in the light weight XC full suspension category with an eye towards racing. It is light enough that you’re not at a weight penalty against hardtails but you also gain the benefits of rear suspension to aid in soaking up the rough trails or gripping the more technical climbs. The Scandium frame is especially comfortable and the parts spec were completed with the idea of combining high end, light weight and durable parts together.

The Kona Hei Hei is definitely a bike to take a look at if you’re going full suspension for racing, endurance riding, or ripping the trails with your buddies.

For more info on the Kona Hei Hei, click here.


Ready to rip the trail

Popularity: 25% [?]

Review: Ryders Eyewear “Tread”


Who: Ryders Eyewear on their “Chill” Collection sunglasses:

When the adrenaline isn’t pumping, we like to talk about the times when it was, or the next time that it will. This collection has been designed just for those times and developed with fashionable style in mind-something that is often compromised in high-performance eyewear. Some styles in this collection boast high-performance features that are found in our Adrenaline Collection, and all have our optically-correct, shatter-proof lenses.

Product Tested:
Ryders Eyewear Tread Sunglasses


Ryders Eyewear Tread Sunglasses

Website’s MSRP:
$ 39.99

Specs:
FRAME: Tortois Duraflex
LENS: Brown, Polycarbonate, 100% UV Protection
TINT: 16.9% Visible Light Transmission
FIT: Medium
FEATURES: Anti-Slip Nose Pads and Temple Tips

About Me:
6’1? 210lbs, 28 year old male. I’m a mountain biking enthusiast who enjoys rocking the big 29er wheels. I’m mainly a XC rider.

Testing Grounds:
All over Southern California on sunny days, of course!


After months of hard use, the Ryders Tread sunglasses are still going strong

First Impressions:
Ryder’s Eyewear sent over a pair of the Tread sunglasses for us to wear. This pair of sunglasses is from their “Chill? collection. My first thoughts were that the sunglasses were very styling. The gold on the arms of the sunglasses were blingy. ;)

Strengths:
The comfortable nose pads and temple pads. Ryder’s calls them Hydrophilic Pads. I call them comfortable. Many lower end sunglasses do not have comfortable nose or temple pads. They tend to be just plastic throughout these areas without any padding. This seems to be a good place to cut costs for many low end sunglass makers. Ryder’s, though, has nice nose pads that felt extremely comfortable to my nose bridge and soft temple pads that not only felt good, but also did a good job holding the sunglasses to my head.


Out on the trail

Style is very subjective but the Tread sunglasses, with their turtle shell look and gold band, were very styling. I received many comments on how they looked over testing period. Some people liked it, others not so much. But since style is so subjective, I can easily say that I liked how the sunglasses looked.

These sunglasses were quite durable during the testing period. I treated these “chill? sunglasses the way I normally treat my sunglasses: I lightly abuse them. While not wearing them in the car, I kept the sunglasses in the small bin underneath the radio stack. This bin gave the sunglasses a chance to be tossed around by my driving. When I was out and not wearing them, I would either hook them on my head backwards or on my shirt collar. When I reached down to pick up something, the sunglasses would inevitably drop onto the floor. Surprisingly, over the last couple of months, the Ryders sunglasses have held up even better than I would have expected through my abuse.

The Ryders sunglasses are extremely comfortable. They grip my head comfortably, not too snugly which can be a problem with some other sunglasses that have cheesy hinges. These hinges however allowed the arms of the sunglasses to fit my large head comfortably and never made me feel like I was constricting blood flow to the brain.


The Tread being worn backwards, during the not so sunny days

Weakness:
The only con for these sunglasses is that it is not a true pair of mountain biking sunglasses. Although the Tread does not claim to be mountain biking sunglasses, I have taken them out off-roading. They work fine as long as the sun is bright in the sky, but in other lower light conditions such as dawn/dusk, the Tread would not be suitable for mountain biking. Thankfully, since they were not made for this, I really can’t hold it against them. For chillin’ at the post ride beverage spot, these glasses are great.

Summary:
Ryder’s Eyewear has a nice pair of Tread sunglasses at a competitive price point. These sunglasses are stylish, comfortable and durable. The little nose pads and temple pads set these glasses apart in the comfort department while the blingy gold band and turtle shell brown frame gives the glasses a good dose of style. The Tread can also double as mountain biking sunglasses on bright sunny days.

Click here for more information about the Ryders Eyewear Tread sunglasses


Comfortable & Stylish

Popularity: 19% [?]

Ergon GC2 Magnesium Review


Ergon GC2 Magnesium Grips
Specs:

Multi-position grips with integrated cold forged alu barends, which have a dual function acting as the clamps for the grip. The shape of the grip is identical to the GP1. The GC2 is the replacement for the older R1 model. It features a longer, ergonomically optimized barend, which is adjustable in terms of its angle on the bar. Its size and shape are ideal for small to middle sized hands (Size S: 6.5 – 8.5) as well as for middle to larger sized hands (Size L: 8.5 – 10.5). The barend and the support platform on the grip can be independently adjusted for the correct angle to allow optimized fit for individual saddle position and riding style
Sizes: S, L GC2
Sizes: S, L GC2 Gripshift® compatible
Sizes: S, L GC2 Rohloff®/Nexus® compatible
Gender • Unisex
Size • Small, Large
Clamp • Forged Aluminum
Use • Mountainbike, Touring
Price (MRSP) 29.95 $US

I’ve been riding with the GC2 grips for about 4 months now. During the test period, the grips were mounted on the Sette Reken Single Speed project bike. This bike has seen various trails such as the Fullerton Loop, Turnbull Canyon, Aliso Woods, Southridge and many more.

Pros:
-Easy to install
-Very comfortable
-Multiple position possibilities
-Great bar ends for climbing, a must on single speeds
-Black, the best color in the world
-Bar end doesn’t stick out too far, great for aesthetics

Cons:

-Not the best grips for tackling very technical terrain

Installation of the grips were very easy. The outer portion of the grips have a lock on feature that keeps them in place. The grips are excellent for climbing, thanks to the bar ends. I’ve used other bar ends that attach separately from my grips and I didn’t like those because they would cause you to lose bar space since they needed an additional 3/4 of an inch on both sides to mount. But what I liked about the GC2 is the all in one grip set. Not only do you have the bar end attached to the ergonomic grip, but it also fully adjustable for your needs.

The GC2 are very comfortable grips to use, they allow multiple hand positions in which you can even rest your palms on the wider portion of the grip. Changing hand positions during a long grind can help prevent hand fatigue in the long run.

My only beef with these grips would be the feeling that I wasn’t getting enough to grab. From what I understand, Ergon Grips are supposed to give you more hand coverage of their grips over standard grips. But what the weird thing was the feeling that I would get when going down trails like Rock-it and Lynx, both rocky and technical trails. Each time I rode down these trails with the Sette Reken, I found my hands grabbing harder on the bars, which then lead to hand fatigued. When I experienced hand fatigue, I would have to stop and shake my hands until I the burning would go away.

Summary:
Would I recommend it? I’m a bit on the fence on this one. The grips are comfy, the bar ends work great especially for climbing with a single speed. But I just didn’t like that feeling like I didn’t have a full grip. So with all that said, if you are doing strictly XC riding where technical downhills are at a minimum, then sure these would be great for you. But if you plan on using these grips on an AM bike, I’d pass.

Popularity: 21% [?]

Review: eXotic Carbon 29er Fork


Who:
From www.CarbonCycles.cc:

In 1994 we developed an innovative military aerospace shock absorber system melding carbon fiber with aluminum to take advantage of the distinctive advantage of each material.

After developing this complex and innovative technology, we quickly realized the potential for our love of mountain biking. So using aerospace theory & high technology we started to design & produce bike components for our own enjoyment. Other riders soon wanted to know more…

Today, CarbonCycles make the highest quality carbon fiber bicycle components. Our design and manufacturing processes are truly innovative & our components perfectly balance light weight & strength.

Product Tested:
eXotic Carbon 29er Fork


eXotic 29er fork mounted to Redline Mono 9

Website’s MSRP:
$ 366.78

Specs:

- Stunning flagship carbon mountain bike fork with 7075 Aluminium steerer, carbon fibre tube stanchions and forged 6061 Aluminium dropouts.
- This fork is disc brake specific.
- Weight: 680 gm
- 1 1/8 inch threadless ahead steerer
- Uncut steerer length: 265mm
- Diameter of carbon tubes: 34mm
- Rigorously tested to DIN standards.
- FoamX3 technology increases the impact strength of carbon fibre by up to three times by inserting low density foam during the manufacturing process.
- XBar Utilises XBar (pronounced cross-bar) technology to increase lateral strength by 30%.
- Rider weight limit: 95kg (210lbs)

About Me:
6’1�? 215lbs, 28 year old male. I’m a mountain biking enthusiast who enjoys rocking the big 29er wheels. I’m mainly a XC/trail rider.


Full bike setup: fully rigid, with 2.35 inch tire Panaracer Rampage up front

Testing Grounds:
San Juan Trail, Fullerton Loop, Chino Hills State Park, Sea Otter, El Morro and various other southern California trails as well on the streets of Placentia and nearby cities.

First Impressions:
I’m a big fan of carbon, especially for the way it looks. Adding a component with carbon weave has to be one of the best looking things you can add to a bike. But being a husband and father of two has limited the addition of carbon bits to my bike. The carbon weave eXotic fork is truly gorgeous.


Carbon weave is so pretty.

When you hop on the bike you immediately notice that the carbon fork lightens the bike up a lot. I originally started out with a steel fork then moved to an 80mm suspended fork. Now going back to rigid, I immediately noticed the weight difference. I believe it was a drop of about 1.5 lbs.

Strengths:
As a poor Clydesdale I have always stayed away from carbon products. I feared the weakness that many carbon products are “known�? for. So it was with a bit of trepidation that I took on the eXotic Carbon Fork, especially since the website clearly states that the weight limit is 210 lbs and I am 210 lbs when I first get out of bed, fully relieve myself and stand in my birthday suit on the scale (yes, a pretty picture… I know). But, as always, I’m willing to take one for the team.

I was skeptical about the whole “Xbar�? technology that claimed a 30% increase in lateral strength and “FoamX3�? which increases impact strength by inserting foam during the manufacturing process. But after riding this fork hard over the past few months I have to admit that I’m surprised at how well it has held up. I have not held back on the eXotic fork. I’ve take my normal jumps and drops. I’ve run it through rocky sections of the trail. I even put on a 7 inch rotor up front to test how well it does when stressed by a bigger rotor. About the only thing I won’t do is ride through a section that I know I’ll fall on (got to protect the clearcoat). After all of this riding, a check of the fork this morning shows absolutely no problems. The crown looks great. The stanchions look super nice, almost brand new. The clearcoat is still clear and the dropouts show wear from the quick release but that’s normal. I am definitely impressed.


Tackling a short downhill section on the eXotic fork

The eXotic carbon fork is SUPER comfortable. Compared to a steel fork, there is really no comparison. The feel of a steel fork is nice, but not comfortable. A steel fork dampens some trail chatter but it’s still steel. To think it would do more than that is dreaming. I think of a steel fork as just beginning to mute out trail chatter.

The eXotic carbon fork, on the other hand, takes a significant step up in muting trail chatter. The chatter doesn’t quite vanish as it would if I was running a nice suspension fork, but the carbon fork does make riding easier on the hands and arms. On one particular local trail there is a section of about 4 miles that is fast, rolling fireroad. On the downhills I can easily reach speeds of over 30 mph on the rigid. This fireroad, though, is typical So. Cal fireroad. It’s hardpacked, has washboard stutter bumps and is rutted in many places. When I previously rode this section of trail with the steel fork my hands would be exhausted and sometimes even stinging from the trail. But with the eXotic carbon fork my hands still feel strong afterwards.


Comfortable on the dirt covered rock

The carbon fork lightens up the bike but particularly the front end. I feel this a lot when climbing a trail that has lots of roots or rocks. Lofting the front wheel is so much easier when it is 1.5 lbs lighter than a suspended fork. I especially noticed this when I was switching back and forth between a full suspension bike that weighs nearly the same as the bike with the carbon fork. Raising the lighter front end to clear roots and rocks, especially when I’m tired, requires less effort saving my strength for turning the cranks.

Weakness:
As with all carbon products, the clearcoat covering the carbon needs to stay in pristine condition. Once you scratch up the clearcoat, you’ve got to be extra careful about the component. Because of this, I took extra caution with my brake housing. I did not take extra caution while riding around on the trails. I decided to install a Sette Clear Frame Patch Protectors on the spot where the hose would rub the fork.

Other than this precaution, I had no issues with this fork.


Sette Frame Patch Protectors to protect the carbon’s clear coat finish from the dreaded brake hose

Summary:
The eXotic Carbon 29er fork has performed extremely well over the review period. It has been comfortable, strong, light and very easy on the eyes. I would highly recommend this fork for those looking to ride their mountain bike rigid.

Click here for more information about the eXotic Carbon 29er fork.


The fork is dirty, but ready to roll

Popularity: 38% [?]

Guest Review: Crank Brothers Cobalt Crankset


This review is from one of our riding partners, Tim “Scissor Hands” Shears. Scissor Hands has an inquiring mind matched to a good wit. His thoughts on Crank Brother’s Cobalt cranks and his experience with Crank Brothers are helpful for those considering a new set of nice cranks for their rig.

I know what you’re thinking: a crank set review, what is there to review? Well, let me tell you there is definitely something to talk about here. Some time ago I scored a sweet deal on a new Crank Brothers Cobalt Chromoly crankset on Ebay. It was destined for a 29er build project I was planning. Isolating this review on the crankset only, without considering the bike as a whole, was a bit of a challenge but after many sleepless nights and a whole lot of caffeine I came up with a few thoughts that I’d like to share.

First of all I am a xc rider, amateur racer (two races under my belt now!) and die hard weekend warrior. I weigh about 170 geared up and stand about 5’10?. I always try to shift at the most opportune time by always trying to keep my eyes up and preparing ahead of time for hills and descents or whatever is coming up on the trail. In my experience this is the smoothest way to ride not to mention the easiest on the drivetrain. Needless to say I always tried to ride my rigs as efficiently as possible without any purposeful abuse.


Crankbrothers Cobalt SL w/ti bottom bracket

Out of the box, you notice right away that this is no ordinary crankset. It is gorgeous and well thought out. A lot of planning went into the design and appearance of these parts. Maybe it’s due to the design, but I find that my heels never seem to rub on the arms of this crankset. I know you’ve seen those used cranks on Ebay with all the scrapes and scratches that seriously diminish that appearance. On the Cobalt, my feet seem to ride pretty parallel so no scratches for me. The BB is so nicely designed that I wouldn’t mind putting it on the wall, throw a frame around and pointing it out as cousin “BB?. Why don’t we have transparent BB shells? Someone seriously has to invent this.

So the installation was pretty straightforward, make sure everything is clean, greased and torqued to the proper specs. This setup is an ISIS only design. I had previously read some pretty negative comments about ISIS drive setups but decided to take my chance anyway. Crank Brothers has a ridiculous 5 year warranty on the Crankset and BB. I actually got to take advantage of this offer as for some reason I could never get the crank bolts to stay tight. It got to the point that not even blue Loctite could keep the non-drive side to stay torqued. One e-mail to Crank Brothers and off went my set up via USPS. A few days later I had a brand new setup on my porch with a surprising upgrade, a titanium BB. From the quick response and the upgrade, I can confidently say that Cranks Brothers does know how to take care of its customers.


Installed on the On-One

Riding these cranks presented no problems with stiffness or flex. I’m not a big guy so maybe those with a little more girth would beg to differ. I’ve read that Crank Brothers came up with the idea for these cranks by playing with a shoe box and what they noticed about the stiffness of the overall structure dramatically increasing when the lid was on compared to when it was off; don’t quote me on this but either way I had no issues in this department.

One thing I noticed was that my feet, while riding, were now a little closer together than when I rode my other bike set up with a Race Face Evolve Crankset. Apparently this is known as the Q-Factor. Where the “Q? came from I don’t know, but what I found out was that I actually preferred my feet in this new found position. It’s probably a personal thing that everyone has to discover for themselves, but I found it to be more comfortable on longer rides.

Overall this Crankset and BB were a great addition to my build. After some initial adjustments and a quick e-mail to Crank Brothers I am a happy camper and feel as though I made the right decision with my hard earned money. Quality shifting was always present (with proper front derailleur adjustment of course) and after the BB bearings were broken in this crankset would spin very freely. I paired this Crankset with an xt cassette and a KMC 10 speed chain (the weight weenie in me made me do it) and it never missed a beat. I never got around to actually weighing the parts on a proper scale to see if they weigh as much as advertised but the good ol’ hand hold test revealed that they were definitely light enough for me. My build ended up being 22.3lbs which made me very happy.

If you want a great crankset backed by a company with excellent customer service and a warranty no one else is offering, than this is the one for you.

Click here for Crank Brothers website.

Popularity: 30% [?]