Tunin’ Up the Heckler: Part 2
On to the front brakes I moved after replacing the pivots on the Heckler. After checking the pistons I was about to put the front pads back in when I realized they were in bad shape. My rear brake pads were holding up fine as far as wear and tear goes but the front ones…well, you can see for yourself.
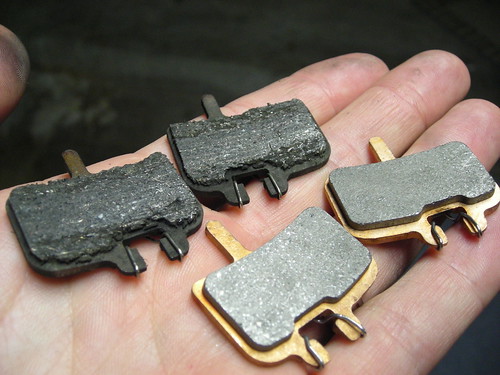
Time for new ones
After a ride to the bike shop and $20 I had me some brand spanking new pads. Replacing pads is a snap. Just slide them into place and your done!
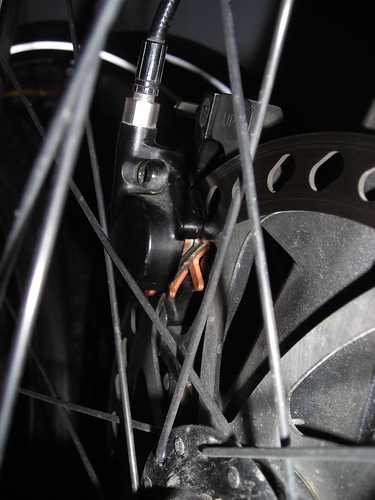
Then it’s on to positioning and tightening down the caliper. I have Hayes Mags front and back and find the easiest way to center them is to have the seating bolts still loose but real close to where they’re almost tightened. I then grab the brake lever hard until it grips the rotor, then(with the other hand) tighten down the bolts on the caliper. This automatically positions the rotor in the middle of the caliper’s pistons.
Positioning the front brake caliper
In case there were any flaws in the rotor I ran a piece of fine grain sand paper over it. Then I ran the rotor through a rag soaked in rubbing alcohol to clean and dry.
Ready to roll
I run an 8″ rotor in the front and 6″ in the back. I just like the one finger power, modulation and control it brings. I should have checked my brake pads far before they got this bad but I am looking forward to getting some power back into the front brakes. Simple maintenance like this can improve the feel of your ride and the performance of your bike so make sure you check your pads every so often. I’m really going to be looking at how well these fixes affect the Heckler’s ride quality. Stay tuned for the Santa Ana River Trail test ride and more tuneups!